Creating SharePoint Terms using the App Context with the new PnP Core SDK
![]()
Introduction
Lately I had the chance to work with the new PnP Core SDK.
Its running under dot net core, which is an awesome improvement compared to the older PnP Sites Core which I used a lot in the past couple of years ❤️

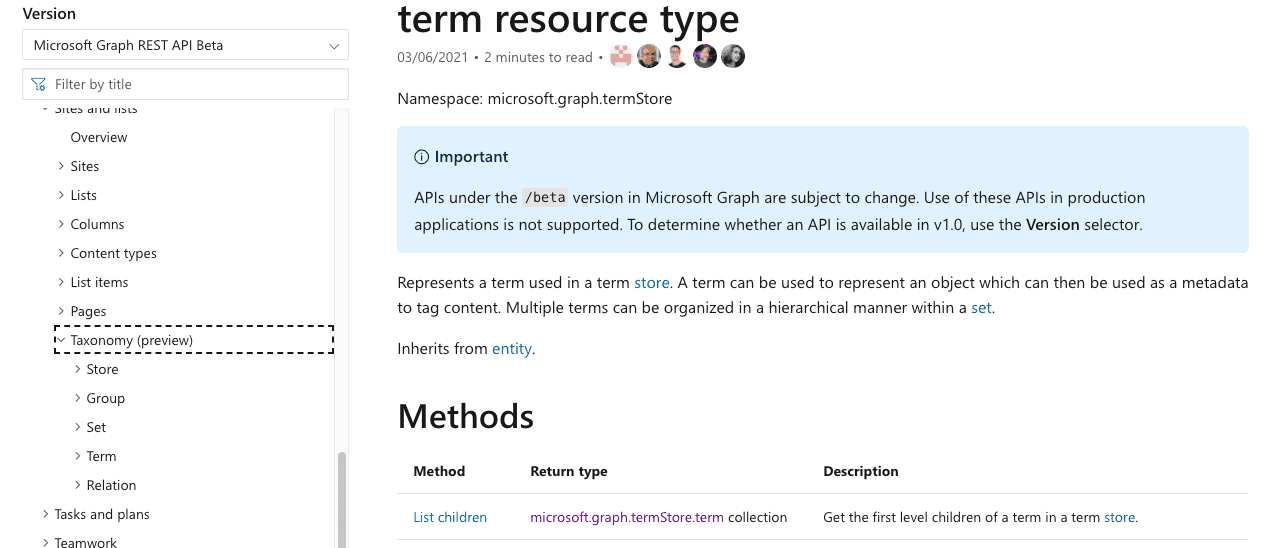
The methods for accessing the termstore leverage the new taxonomy endpoint of MS Graph beta endpoint.
The article shows
- the setup of an Azure AD App using the PnP Powershell Module and
- an Azure Function accessing the Term Store using client certificate authentication.
Setup Authentication
Setting up the Azure AD App for this is straight forward using the Register-PnPAzureADApp PowerShell commandlet.
Im am doing this with macOS Big Sur, so first we have to install PowerShell:
$ brew install --cask powershell
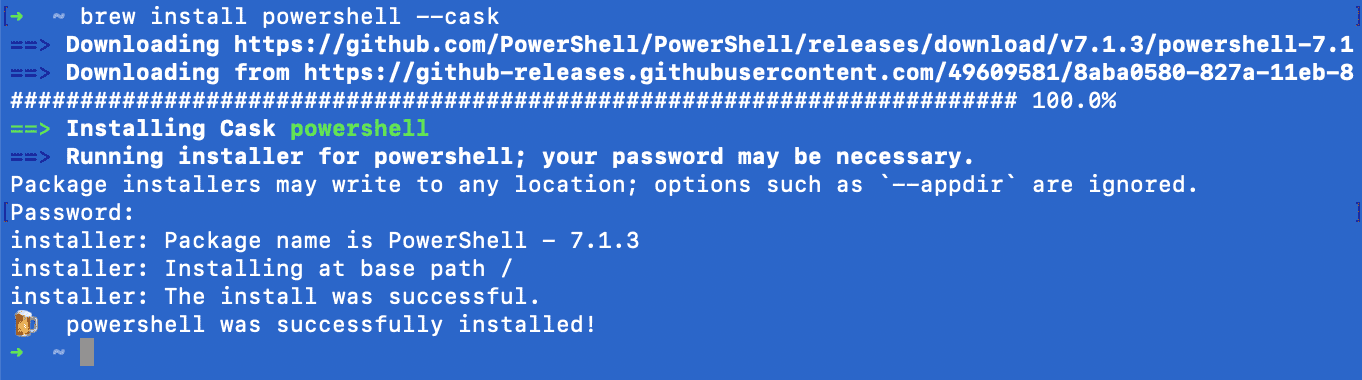
That seemed to work, no lets start PowerShell.
$ pwshInstall the PnP PowerShell Module
Install-Module -Name "PnP.PowerShell"

Untrusted repository
You are installing the modules from an untrusted repository. If you trust this repository, change its InstallationPolicy value by running the Set-PSRepository cmdlet. Are you sure you want to install the modules from 'PSGallery'?
[Y] Yes  [A] Yes to All  [N] No  [L] No to All  [S] Suspend  [?] Help (default is "N"): y
The App can be created and trusted in Azure Active Directory using the Register-PnPAzureADApp PnP commandlet. This commandlet can also create a self-signed certificate out of the box, but this only works on Windows machines.
On Linux/Mac based system we can provide our own certificate using the following openssl commands:
# Create the certificate
$ openssl req -x509 -newkey rsa:4096 -keyout key.pem -out cert.pem -days 365
# Convert to pfx file
$ openssl pkcs12 -export -out certificate.pfx -inkey key.pem -in cert.pem
The command in line 4 converts the certificate created in line 2 to a pfx file, which should have a password.
Now the Client Application can be registered using the Register-PnPAzureADApp command.
The password used for creating the pfx file has now to be passed as the CertificatePassword (line 5) parameter.
The -Scopes parameter in line 8 is requesting the necessary permissions.
Register-PnPAzureADApp `
  -ApplicationName TestApp1 `
  -Tenant <tenant>.onmicrosoft.com `
  -CertificatePath certificate.pfx `
  -CertificatePassword (ConvertTo-SecureString -String "<cert password>" -AsPlainText -Force) `
  -Username "<user>@<tenant>.onmicrosoft.com" `
  -Password (ConvertTo-SecureString -String "<password>" -AsPlainText -Force) `
  -Scopes "SPO.TermStore.ReadWrite.All", "MSGraph.TermStore.ReadWrite.All"
On Windows systems the consent window will open automatically. On Linux/Mac based systems the consent Url is written to STDOUT and should be pasted into a browser window.
https://login.microsoftonline.com
      /loitzl.onmicrosoft.com/v2.0
        /adminconsent
    ?client_id=791ff0ac-1f93-47fc-8629-6b20f360036f
    &scope=https://graph.microsoft.com/.default
    &redirect_uri=http://localhost

The return value contains the necessary values for authentication:

- The certificate.pfx file has been renamed to <AppName>.pfx and <AppName>.cer (here: TestApp1)
- The AzureAppId/ClientId of the newly created application
- The Certificate Thumbprint
- And the Base64 Encoded certificate data
This data is needed for configuring the Azure Function authentication.
The Function
After creating a new function project and adding the PnP Core SDK package with
$ dotnet add package PnP.Core --version 1.1.0adjust the local.settings.json file with the values of the result from Register-PnPAzureADApp result above:
- SiteUrl: Url to connect to
- TenantId: can be retrieved with
Get-PnPTenantId - ClientId: the AzureAppId/ClientId from
Register-PnPAzureADApp - CertificateThumbPrint: also from
Register-PnPAzureADApp

In order to use the PnP Core SDK using dependency injection create a Startup class inheriting from FunctionsStartup as described in the MSDN Docs.
The full source code can be found on my Github.
public class Startup : FunctionsStartup
{
    public override void Configure(IFunctionsHostBuilder builder)
    {
        var config = builder.GetContext().Configuration;
        var settings = new Settings();
        config.Bind(settings);
        builder.Services.AddPnPCore(options =>
        {
            options.DisableTelemetry = true;
            var authProvider = new X509CertificateAuthenticationProvider(
                settings.ClientId.ToString(),
                settings.TenantId.ToString(),
                StoreName.My,
                StoreLocation.CurrentUser,
                settings.CertificateThumbprint);
            options.DefaultAuthenticationProvider = authProvider;
            options.Sites.Add("Default",
                   new PnPCoreSiteOptions
                   {
                       SiteUrl = settings.SiteUrl.ToString(),
                       AuthenticationProvider = authProvider
                   });
        });
    }
}
In lines 10-17 client certificate authentication gets configured, a Default connection is added with the SiteUrlconfigured in the local.settings.json in line 18 to 23.
This allows us to use constructor injection to retrieve a IPnPContextFactory.
public class CreateTerm
{

  private readonly IPnPContextFactory _pnpContextFactory;
  public CreateTerm(IPnPContextFactory pnpContextFactory)
  {
    _pnpContextFactory = pnpContextFactory;
  }
  ...
The IPnPContextFactory can now be used to create a PnPContext instance, retrieve the first ITermGroup and first ITermSet for simplicity (use the *ById() methods in real life).
In the ITermSet we then create a new Term with termSet.Terms.AddAsync(name) method (line 8).
using (var pnpContext = await _pnpContextFactory.CreateAsync("Default"))
{
    _logger.LogInformation("Creating Term '{DefaultLabel}'", name);
    try
    {
        var termGroup = pnpContext.TermStore.Groups.First();
        var termSet = termGroup.Sets.First();
        var newTerm = await termSet.Terms.AddAsync(name);
        return new OkObjectResult(new { id = newTerm.Id });
    }
    catch (MicrosoftGraphServiceException ex)
    {
        _logger.LogError((Exception)ex, ex.Error.ToString());
        return new BadRequestObjectResult(ex.Error);
    }
}
After starting the function in debug mode with F5, we see, that this does not work actually.

We get a MicrosoftGraphServiceException with the message
❌ “The current user has insufficient permissions to perform this operation.”
HttpResponseCode: 403
Code: accessDenied
Message: The current user has insufficient permissions to perform this operation.
ClientRequestId: a07d1a32-410f-4397-8157-e329310c7fb5
date: 2021-05-22T08:55:35
client-request-id: a07d1a32-410f-4397-8157-e329310c7fb5

👉 PnP.Core: Microsoft Graph service exception.
The Problem
Accessing the SharePoint Termstore in the context of the Application (app-only context) needs an old trick that is still possible:
- Add the app principal “app@sharepoint” as Term Group Manager, and it works.

A google search with “i:0i.t|00000003-0000-0ff1-ce00-000000000000|app@sharepoint” reveals, that there are sometimes problems with this approach but that it seems that it is widely used.
Good troubleshoting tips can be found in the Github issue’s discussion.
Conclusion
By the way, all this was created on a new Apple MacBook Pro M1. I really like the fact that more and more of the M365 developer and engineering workloads are now available cross-platform.
Configuration the PnP Core SDK using the
AddPnPCore(
  this IServiceCollection services,
  Action<PnPCoreOptions> options)
extension method and the integration into the .net core dependency injection world is also a great feature.
Links
- Based on the sample Azure Function Code from Demo.AzureFunction in the PnP Core SDK github repo:
please see their Readme.MD for how to actually deploy it to Azure
- Certificates using openssl commandline
- Modifying terms using app-only tokens in SharePoint – undocumented work-around
- The full source code can be found on on Github